Spring WebFlux Series - 13
이전 장(링크) 에서는 AsyncRestTemplate과 DeferredResult를 통해서 외부 API를 호출할 때 발생하는 블록킹 문제를 해결하였다.
이번 장에서는 블록킹 문제를 해결하면서 등장한 Callback Hell이라는 문제를 해결해보도록 한다.
모든 코드는 깃 허브 (링크)의 테스트 코드에 있으므로 필요하다면 참고하도록 한다.
개요
이번 장에서는 이전에 작성한 코드에 새로운 기능을 추가하는 것이 아니라 Callback Hell을 해결하기 위하여 코드를 리펙토링 하는 시간을 가져볼 것이다.
@GetMapping("/my-service/async-complex-with-logic/{idx}")
public DeferredResult<String> complexAsyncWithService(@PathVariable String idx) {
    DeferredResult<String> deferredResult = new DeferredResult<>();

    ListenableFuture<ResponseEntity<String>> future1 = nettyRestTemplate.getForEntity(
            "http://localhost:8081/remote-service-1/{request}", String.class, idx);
    future1.addCallback(success -> {
        ListenableFuture<ResponseEntity<String>> future2 = nettyRestTemplate.getForEntity(
                "http://localhost:8081/remote-service-2/{request}", String.class, Objects.requireNonNull(success).getBody());
        future2.addCallback(success2 -> {
            ListenableFuture<String> future3 = myLogic.work(Objects.requireNonNull(success2).getBody());
            future3.addCallback(success3 -> {
                deferredResult.setResult(success3);
            }, ex3 -> {
                deferredResult.setErrorResult(ex3.getMessage());
            });
        }, ex2 -> {
            deferredResult.setErrorResult(ex2.getMessage());
        });
    }, ex -> {
        deferredResult.setErrorResult(ex.getMessage());
    });
    return deferredResult;
}
우리는 이전에 요청마다 2초의 처리시간이 걸리는 두 개의 API를 호출하고 내부 서비스 로직까지 실행시켜서 반납하는 API를 생성하였다.
코드를 작성하는 과정에서 아래와 같이 연쇄적으로 작동하는 코드를 만들게 되었다.
첫번째 API를 호출하고 성공 -> 두번째 API를 호출하고 성공 -> 서비스 로직 실행
로직만 보면 간단해보일 수 있지만 실제로 코드를 살펴보면 무한 Callback 형식의 지저분한 코드라고 볼 수 있다.
또한 한 번의 Callback이 추가될 때마다 똑같은 형태의 예외처리 코드가 중복되고 있다.
우리가 기존에 작성한 코드를 확인해보면 Callback을 활용한 명령형 코드다.함수형 코드로 작성하면 우리가 작성한 코드와 다르게 복잡하지 않게 구현이 가능하다.
자바8 이상을 사용하고 있다면 깔끔하게 정리가 가능하지만 자바8의 문법을 적용하기 전에 우리의 힘으로 코드를 작성하여 Callback Hell을 해결해본다.
Refactoring
우리가 작성한 코드의 근본적인 문제는 우리가 결과값을 바로 쓸 수 있는 구조가 아니라 결과값을 가져올 수 있는 중개자 역할의 객체를 가져와서 Callback 메서드를 장착하는 구조라는 점이다.
이번에는 비동기 작업 실행의 모든 과정을 담고 있는 클래스를 하나 만들어서 Callback 형식이 아니라 Chaining 형식으로 바뀔 수 있도록 구현해본다.
Version - 1
비동기 작업을 처리하고 ListenableFuture와 같은 객체를 가져와서 Callback으로 데이터를 넣는 작업이 있다고 가정해본다.
우리가 만드는 Completion이라는 클래스는 작업이 완료되거나 에러가 발생하였을 때 이러한 처리를 다시 한 번 재정의 해주기 위한 클래스라고 보면된다.
첫 번재 비동기 작업은 의존성이 앞에 어떤 작업에 의존하지 않기 때문에 파라미터 값 정도를 의존하는 것 말고는 의존성이 없다.
두 번째 비동기 작업 같은 경우는 사실 앞에 비동기 작업이 완료 및 성공을 하게 되면 그 때 정보를 받아서 작동하는 의존적인 비동기 작업이다.
세 번째 비동기도 두 번째 비동기 작업과 같은 구조라고 볼 수 있다.from메서드에서 Completion을 반환할 때 Callback메서드를 처리하는 로직을 추가하였다.from에 대한 결과를 두 번째에 이어서 andAccept에서 Completion 객체를 생성한다.
람다식 안에서 결과값을 변경가능 하도록 수정이 필요하다.andAccept의 경우 다음에 추가적인 작업이 필요없으므로 리턴값은 void로 지정하였다.
andAccept는 from의 결과를 andAccept의 파라미터로 들어가있는 람다식에 전달하여 처리되도록 한다.andAccept가 호출될 때 파라미터로 전달받은 Consumer 객체를 통해 새로운 Completion 객체를 생성하고 생성된 객체를 next 변수에 대입한다.
호출부
@GetMapping("/callback-hell/resolve/v1/{idx}")
public DeferredResult<String> callbackHellResolveV1(@PathVariable int idx) {
    DeferredResult<String> dr = new DeferredResult<>();
    CompletionV1
            .from(rt.getForEntity(URL_1, String.class, "v1_" + idx))
            .andAccept(success -> dr.setResult(success.getBody()));
    return dr;
}
CompletionV1
@NoArgsConstructor
public class CompletionV1 {
    private CompletionV1 next;
    private Consumer<ResponseEntity<String>> consumer;
    public CompletionV1(Consumer<ResponseEntity<String>> consumer) {
        this.consumer = consumer;
    }
    public static CompletionV1 from(ListenableFuture<ResponseEntity<String>> lf) {
        CompletionV1 completionV1 = new CompletionV1();
        lf.addCallback(completionV1::complete, completionV1::error);
        return completionV1;
    }
    public void andAccept(Consumer<ResponseEntity<String>> consumer) {
        this.next = new CompletionV1(consumer);
    }
    private void complete(ResponseEntity<String> success) {
        if (Objects.nonNull(next)) {
            next.run(success);
        }
    }
    private void run(ResponseEntity<String> success) {
        if (Objects.nonNull(consumer)) {
            consumer.accept(success);
        }
    }
    private void error(Throwable failure) {}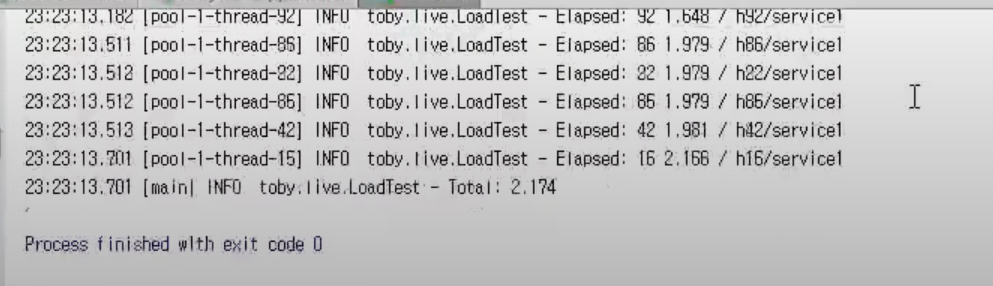
}andAccept를 통해서 하나의 Callback 메서드만 전달하여 호출해본다.
(이번 예제 또한 필자의 스프링 버전에서 비동기로 작동하지 않는 현상이 발생하여 첨부하는 이미지를 영상의 출력값으로 대체한다.)
출력된 결과는 아래와 같이 2초 정도 시간이 소요되었고 우리가 예상한 결과가 출력된 것을 확인할 수 있다.
Version - 2
이번에는 Completion 객체를 추가하여 한 번에 두 개를 Chaining하여 2단 Callback 구조를 Chaining 구조로 변경해본다.andApply 메서드를 추가하여 중간에 Callback 메서드를 하나 추가하였다.Function이 추가되면서 run 메서드도 변경이 필요해졌다.
기존에 consumer의 유무를 확인하고 로직을 실행시켰지만 function이 추가되면서 function이 존재하는 경우에 대한 처리까지 필요해졌다.
만약 function이 null이 아니라면 function의 apply를 호출하여 백그라운드에서 API 호출과 같은 작업들이 수행되고 결과를 ListenableFuture로 반환되게 하였다.
반환된 ListenableFuture는 apply의 결과가 성공인 경우 자기 자신의 complete 메서드를 호출하고 실패한 경우 자기 자신의 error 메서드를 호출한다.andApply와 andAccept의 가장 큰 차이는 작업의 완료와 과정의 차이라고 할 수 있다.andApply는 자신을 적용한 이후에 다음 Completion 객체를 연결시켜 다음 작업을 진행할 수 있도록 해야한다.andAccept는 자신이 호출되면서 작업이 완료되므로 다음 Completion객체를 연결할 필요가 없다.Builder와 비교하면 필드명으로 필드의 값을 입력하여 builder객체를 반환하는 것은 andApply라고 할 수 있고 build()메서드를 호출하여 우리가 생성하고자하는 객체를 생성하는 단계를 andAccept라고 할 수 있다.
호출부
@GetMapping("/callback-hell/resolve/v2/{idx}")
public DeferredResult<String> callbackHellResolveV2(@PathVariable int idx) {
    DeferredResult<String> dr = new DeferredResult<>();
    CompletionV2
            .from(rt.getForEntity(URL_1, String.class, "v2_" + idx))
            .andApply(success -> rt.getForEntity(URL_2, String.class, success.getBody()))
            .andAccept(success -> dr.setResult(success.getBody()));
    return dr;
}
CompletionV2
@NoArgsConstructor
public class CompletionV2 {
    private CompletionV2 next;
    private Consumer<ResponseEntity<String>> consumer;
    public CompletionV2(Consumer<ResponseEntity<String>> consumer) {
        this.consumer = consumer;
    }
    private Function<ResponseEntity<String>, ListenableFuture<ResponseEntity<String>>> function;
    public CompletionV2(Function<ResponseEntity<String>, ListenableFuture<ResponseEntity<String>>> function) {
        this.function = function;
    }
    public static CompletionV2 from(ListenableFuture<ResponseEntity<String>> lf) {
        CompletionV2 completionV2 = new CompletionV2();
        lf.addCallback(completionV2::complete, completionV2::error);
        return completionV2;
    }
    public void andAccept(Consumer<ResponseEntity<String>> consumer) {
        this.next = new CompletionV2(consumer);
    }
    public CompletionV2 andApply(Function<ResponseEntity<String>, ListenableFuture<ResponseEntity<String>>> function) {
        CompletionV2 completionV2 = new CompletionV2(function);
        this.next = completionV2;
        return completionV2;
    }
    private void complete(ResponseEntity<String> success) {
        if (Objects.nonNull(next)) {
            next.run(success);
        }
    }
    private void run(ResponseEntity<String> success) {
        if (Objects.nonNull(consumer)) {
            consumer.accept(success);
        } else if (Objects.nonNull(function)) {
            ListenableFuture<ResponseEntity<String>> lf = function.apply(success);
            lf.addCallback(this::complete, this::error);
        }
    }
    private void error(Throwable failure) {}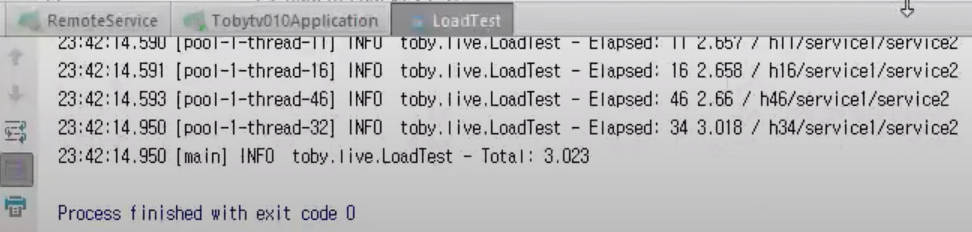
}andApply를 추가한 코드를 실행하여 출력되는 결과를 확인해보면 우리가 예상한대로 결과가 출력되는 것을 확인할 수 있다.

여기서 CompletionV2 클래스에서 run메서드를 확인해보면 객체가 생성되고 실행되는 시점에 필드의 값을 확인하여 어떠한 용도록 사용되는 객체인지 if문을 사용하여 구분하고 있다.
이러한 코드는 리펙토링이 필요한 코드로 판단되며 용도에 따라서 AsyncCompletion과 AcceptCompletion 두 개의 객체로 구분하여 다형성을 적용시켜 본다.
Version - 3
CompletionV3 클래스에 CompletionV3를 상속받는 내부 클래스인 AcceptCompletion과 AsyncCompletion을 구현하였다.
다형성 적용이 필요한 run 메서드를 아래와 같이 수정하였다.
코드를 살펴보면 기존에 하나의 run 메서드에서 분기처리가 되던 코드를 두 개의 클래스로 나누어 다형성을 적용시킨 것을 확인할 수 있다.Version - 3는 기능적으로 변경된 부분은 없으며 공통된 부분은 하나로 추출하고 다형성을 적용시킬 수 있는 부분에 다형성을 적용시켜 쉽게 확장시킬 수 있도록 변경하였다.
호출부
@GetMapping("/callback-hell/resolve/v3/{idx}")
public DeferredResult<String> callbackHellResolveV3(@PathVariable int idx) {
    DeferredResult<String> dr = new DeferredResult<>();
    CompletionV3
            .from(rt.getForEntity(URL_1, String.class, "v3_" + idx))
            .andApply(success -> rt.getForEntity(URL_2, String.class, success.getBody()))
            .andAccept(success -> dr.setResult(success.getBody()));
    return dr;
}
CompletionV3
@NoArgsConstructor
public class CompletionV3 {
    private CompletionV3 next;
    public static CompletionV3 from(ListenableFuture<ResponseEntity<String>> lf) {
        CompletionV3 completionV3 = new CompletionV3();
        lf.addCallback(completionV3::complete, completionV3::error);
        return completionV3;
    }
    public void andAccept(Consumer<ResponseEntity<String>> consumer) {
        this.next = new AcceptCompletion(consumer);
    }
    public CompletionV3 andApply(Function<ResponseEntity<String>, ListenableFuture<ResponseEntity<String>>> function) {
        CompletionV3 completionV3 = new ApplyCompletion(function);
        this.next = completionV3;
        return completionV3;
    }
    public void run(ResponseEntity<String> value) {}
    protected void complete(ResponseEntity<String> success) {
        if (Objects.nonNull(next)) {
            next.run(success);
        }
    }
    protected void error(Throwable failure) {}
    public static class AcceptCompletion extends CompletionV3 {
        private Consumer<ResponseEntity<String>> consumer;
        public AcceptCompletion(Consumer<ResponseEntity<String>> consumer) {
            this.consumer = consumer;
        }
        @Override
        public void run(ResponseEntity<String> value) {
            consumer.accept(value);
        }
    }
    public static class ApplyCompletion extends CompletionV3 {
        private Function<ResponseEntity<String>, ListenableFuture<ResponseEntity<String>>> function;
        public ApplyCompletion(Function<ResponseEntity<String>, ListenableFuture<ResponseEntity<String>>> function) {
            this.function = function;
        }
        @Override
        public void run(ResponseEntity<String> value) {
            ListenableFuture<ResponseEntity<String>> lf = function.apply(value);
            lf.addCallback(this::complete, this::error);
        }
    }
}
Version - 4
Version - 4에서는 에러 처리가 중복으로 표시되는 문제를 해결해본다.
여기서 에러 처리가 중복된다는 것은 Callback 지옥의 코드와 같이 비동기 처리가 진행될 때 마다 동일한 에러처리 코드가 계속 중복되어 사용된다는 점이다.
에러 처리는 전체의 흐름에서 단 한번만 처리하도록 Version - 4의 클래스 코드를 생성해본다.
호출부
@GetMapping("/callback-hell/resolve/v4/{idx}")
public DeferredResult<String> callbackHellResolveV4(@PathVariable int idx) {
    DeferredResult<String> dr = new DeferredResult<>();
    CompletionV4
            .from(rt.getForEntity(URL_1, String.class, "v4_" + idx))
            .andApply(success -> rt.getForEntity(URL_2, String.class, success.getBody()))
            .andError(dr::setErrorResult)
            .andAccept(success -> dr.setResult(success.getBody()));
    return dr;
}CompletionV4를 사용하는 코드를 확인해보면 1번 비동기 작업인 from이 있고 2번 비동기 작업인 andApply가 있다.
우리는 두 개 중 하나에서 오류가 발생하더라도 andError의 매개변수로 입력된 function이 실행되도록 구현할 것이다.
또한 예외가 발생하는 경우 이후의 작업인 andAccept는 실행되지 않아야하며 예외가 발생하지 않는 경우 정상적으로 andAccept가 호출되어야 한다.
CompletionV4
public class CompletionV4 {
    protected CompletionV4 next;
    public static CompletionV4 from(ListenableFuture<ResponseEntity<String>> lf) {
        CompletionV4 completionV4 = new CompletionV4();
        lf.addCallback(completionV4::complete, completionV4::error);
        return completionV4;
    }
    public CompletionV4 andError(Consumer<Throwable> errConsumer) {
        CompletionV4 completionV4 = new ErrorCompletion(errConsumer);
        this.next = completionV4;
        return completionV4;
    }
    public void andAccept(Consumer<ResponseEntity<String>> consumer) {
        this.next = new CompletionV4.AcceptCompletion(consumer);
    }
    public CompletionV4 andApply(Function<ResponseEntity<String>, ListenableFuture<ResponseEntity<String>>> function) {
        CompletionV4 completionV4 = new CompletionV4.ApplyCompletion(function);
        this.next = completionV4;
        return completionV4;
    }
    public void run(ResponseEntity<String> value) {}
    protected void complete(ResponseEntity<String> success) {
        if (Objects.nonNull(next)) {
            next.run(success);
        }
    }
    protected void error(Throwable throwable) {
        if (Objects.nonNull(next)) {
            next.error(throwable);
        }
    }
    public static class ErrorCompletion extends CompletionV4 {
        public Consumer<Throwable> errConsumer;
        public ErrorCompletion(Consumer<Throwable> errConsumer) {
            this.errConsumer = errConsumer;
        }
        @Override
        public void run(ResponseEntity<String> value) {
            if (Objects.nonNull(next)) {
                next.run(value);
            }
        }
        @Override
        public void error(Throwable e) {
            errConsumer.accept(e);
        }
    }
    public static class AcceptCompletion extends CompletionV4 {
        private Consumer<ResponseEntity<String>> consumer;
        public AcceptCompletion(Consumer<ResponseEntity<String>> consumer) {
            this.consumer = consumer;
        }
        @Override
        public void run(ResponseEntity<String> value) {
            consumer.accept(value);
        }
    }
    public static class ApplyCompletion extends CompletionV4 {
        private Function<ResponseEntity<String>, ListenableFuture<ResponseEntity<String>>> function;
        public ApplyCompletion(Function<ResponseEntity<String>, ListenableFuture<ResponseEntity<String>>> function) {
            this.function = function;
        }
        @Override
        public void run(ResponseEntity<String> value) {
            ListenableFuture<ResponseEntity<String>> lf = function.apply(value);
            lf.addCallback(this::complete, this::error);
        }
    }
}CompletionV4의 onError 메서드를 살펴보면 계속 next객체의 onError 메서드로 예외를 전달한다.
그러다가 ErrorCompletion 객체를 만나면 @Override된 onError 메서드가 호출되어 더 이상 에러가 전달되지 않고 처리되도록 구현되었다.
우리가 예상하는 대로 코드가 정상작동 하는지 테스트를 진행해본다.

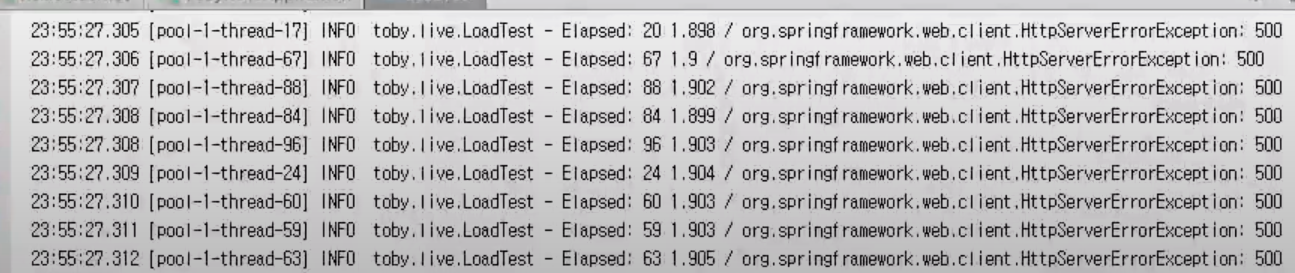
다음으로 from 부분에서 에러가 발생하도록 코드를 수정하고 andAccept가 호출되지 않는 것을 확인해본다.
출력 결과를 확인해보면 우리의 예상과 같이 andAccept가 호출되지 않고 에러 메시지가 반환되는 것을 확인할 수 있다.
Version - 5
마지막으로 Version - 5 버전은 외부 API를 호출하는 코드뿐만 아니라 내부 로직인 MyLogic을 호출하는 부분도 동일한 방법으로 처리한다.Version - 5버전을 적용할 때 컨트롤러 코드는 기존 버전들과 동일하게 andApply만 추가로 연결하면 된다.
하지만 MyLogic의 work 메서드의 반환 타입이 String이므로 CompletionV5에 제네릭을 적용시켜야 한다.
호출부
@GetMapping("/callback-hell/resolve/v5/{idx}")
public DeferredResult<String> callbackHellResolveV5(@PathVariable int idx) {
    DeferredResult<String> dr = new DeferredResult<>();
    CompletionV5
            .from(rt.getForEntity(URL_1, String.class, "v5_" + idx))
            .andApply(success -> rt.getForEntity(URL_2, String.class, success.getBody()))
            .andApply(success -> myLogic.work(success.getBody()))
            .andError(dr::setErrorResult)
            .andAccept(dr::setResult);
    return dr;
}
CompletionV5
public class CompletionV5<S, T> {
    protected CompletionV5 next;
    public void andAccept(Consumer<T> consumer) {
        this.next = new AcceptCompletion<>(consumer);
    }
    public static <S, T> CompletionV5<S, T> from(ListenableFuture<T> lf) {
        CompletionV5<S, T> completionV5 = new CompletionV5<>();
        lf.addCallback(completionV5::complete, completionV5::error);
        return completionV5;
    }
    public CompletionV5<T, T> andError(Consumer<Throwable> errConsumer) {
        CompletionV5<T, T> completionV5 = new ErrorCompletion<>(errConsumer);
        this.next = completionV5;
        return completionV5;
    }
    public <V> CompletionV5<T, V> andApply(Function<T, ListenableFuture<V>> function) {
        CompletionV5<T, V> completionV5 = new ApplyCompletion<>(function);
        this.next = completionV5;
        return completionV5;
    }
    public void run(S value) {}
    protected void complete(T success) {
        if (Objects.nonNull(next)) {
            next.run(success);
        }
    }
    protected void error(Throwable throwable) {
        if (Objects.nonNull(next)) {
            next.error(throwable);
        }
    }
    public static class ErrorCompletion<T> extends CompletionV5<T, T> {
        public Consumer<Throwable> errConsumer;
        public ErrorCompletion(Consumer<Throwable> errConsumer) {
            this.errConsumer = errConsumer;
        }
        @Override
        public void run(T value) {
            if (Objects.nonNull(next)) {
                next.run(value);
            }
        }
        @Override
        public void error(Throwable e) {
            errConsumer.accept(e);
        }
    }
    public static class AcceptCompletion<S> extends CompletionV5<S, Void> {
        private Consumer<S> consumer;
        public AcceptCompletion(Consumer<S> consumer) {
            this.consumer = consumer;
        }
        @Override
        public void run(S value) {
            consumer.accept(value);
        }

    }
    public static class ApplyCompletion<S, T> extends CompletionV5<S, T> {
        private Function<S, ListenableFuture<T>> function;
        public ApplyCompletion(Function<S, ListenableFuture<T>> function) {
            this.function = function;
        }
        @Override
        public void run(S value) {
            ListenableFuture<T> lf = function.apply(value);
            lf.addCallback(this::complete, this::error);
        }
    }
}
제네릭을 적용시켰다면 결과가 정상적으로 출력되는지 결과를 확인해보도록 한다.
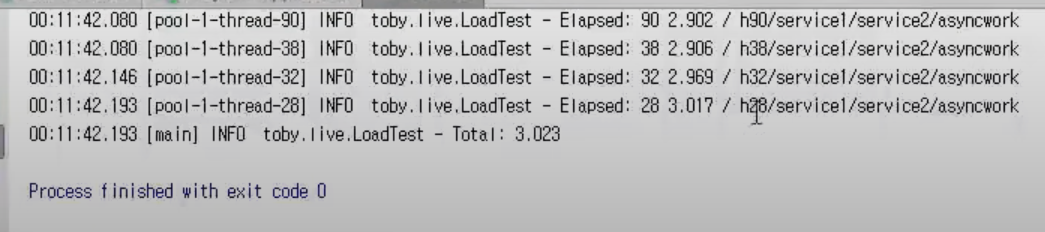
우리가 예상한 것과 동일한 결과가 출력되는 것을 확인할 수 있다.
이번 장에서는 Callback 지옥 코드를 해결하는 방법에 대해서 알아보았다.
리펙토링 결과 이전의 Callback 지옥 코드와는 다르게 상당히 간소화된 코드를 확인할 수 있었다.
참고
Function 인터페이스의 compose는 다른 메서드를 실행할 수 있도록 해준다.andThen을 현재 Function의 apply을 실행하고 다음 Function의 apply를 실행할 수 있도록 한다.andAccept라는 것은 Consumer 인터페이스를 구현한 람다식을 만들면 Accept하나만 구현하게 된다.
참고한 강의
'Spring > WebFlux' 카테고리의 다른 글
| [Reactive Programming] WebFlux (0) | 2022.05.09 |
|---|---|
| [Reactive Programming] Completable Future (0) | 2022.05.03 |
| [Reactive Programming] Rest Template - 복합 (0) | 2022.04.29 |
| [Reactive Programming] Rest Template - Async (0) | 2022.04.29 |
| [Reactive Programming] Rest Template - Blocking (0) | 2022.04.28 |


